If you’re an Apple Macintosh user and you want to migrate and synchronise your Outlook 2011 for Mac or Outlook 2016 for Mac data to Office 365 Exchange Online it’s not all that easy. Outlook for Mac will only export an OLM file, which can’t be transported to Azure in order to use the data import tool in Office 365, as that only supports PST files.
Synchronising email and contacts is relatively straightforward with the fall back option being to export from Outlook 2011 for Mac and import to Outlook 2016 for Mac. Alternatively you can select the import Outlook 2011 data on the computer in the Import dialogue of Outlook 2016 for Mac. Once you have all the email and contact items imported, which will create an On My Computer folder, select all the email or contact entries from your old Outlook and then drag them to the new Exchange Online account in Office 365. This is far from ideal, but it works, even if it does take some time.
Synchronising calendar items is a whole different problem, where you will need to select each and every calendar item individually, or at least change the view to Month and select entries month by month, and copy them to Exchange Online. That’s fine if you only have a handful. If you have several thousand entries, retained over several years, it’s not at all practical.
However, there is a solution, even though it is a little knife-and-fork. This involves exporting Calendar items to the OLM file, converting the file to ICS and exporting that ICS file in to the Mac Calendar App for the Exchange Online calendar. It seems a little convoluted, but check the steps below:
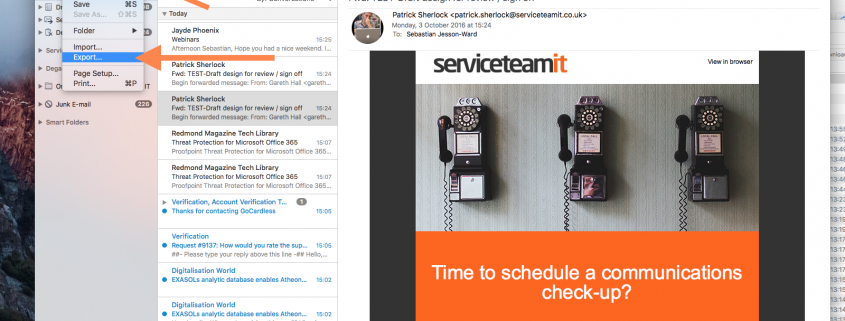
- Export only your calendar items from Outlook to an OLM file, call it Outlook:


- Convert the OLM file to an ICS file with one of the Apps from the App Store, such as this one.
- Open the Mac Calendar App:

- Select Calendar and click Accounts:

- Ensure you have the Calendar selected for your Exchange account:

- Select Calendar and click Preferences:

- Ensure that Enable this account is selected:

- Create a new event in your Exchange Calendar:

- Select the Exchange calendar on the left. If you cannot see this calendar, click Calendars at the top:

- Select File, Export and click Export:

- Give the file a name and a location, such as Documents, click Export:

- Go to this location in Finder, right click and Open with TextEdit:

- Open the file exported via the App from OLM to ICS in Finder right click and Open with TextEdit:

- Select the text from the file, Calendar, from BEGIN:VCALENDAR to the next BEGIN and copy:

- Select the text from the file, Outlook, from BEGIN:VCALENDAR to the next BEGIN and paste:

- Go back to the Calendar App, select File and click Import:

- Select Outlook.ics and click Import:

- On the dropdown select your Exchange calendar and click OK:


- If you have a number of “The following information couldn’t be added to Exchange: time zone:Floating” in the notes of the entry this is due to floating time zones not being supported. Please ignore them.
- Should you receive additional errors whilst importing, or the file failing to import, there is a very useful tool in order to verify the ICS file called iCal4j.
It may take a short while for the calendar to synchronise, depending upon the number of calendar items you have. You will now see them in Outlook 2016 for Mac and the Outlook Web App for Office 365. If you have any questions or need a little more in-depth help please get in touch.


I’m not easily imdpessed. . . but that’s impressing me! 🙂